

Transform your kitchen with a fresh, new floor! This comprehensive guide from Don’t Forgot will walk you through how to Replace the Kitchen Floor. From selecting the perfect flooring to mastering the installation, we’ve got you covered. Let’s get started!
The first step is to remove the grout between the tiles. This can be a messy job, so protect yourself with gloves, goggles, and a dust mask. Use a grout removal tool, a utility knife, or an angle grinder equipped with a grout removal blade to carefully dig out the grout. Once the grout is removed, you’ll be ready to tackle the next step: removing the old tiles.
Whether you’re a DIY enthusiast eager to tackle the project yourself or prefer the expertise of a professional contractor, you’ll find valuable insights and step-by-step instructions to achieve the kitchen of your dreams.
Assessing Your Current Kitchen Floor
Before starting a kitchen floor renovation, check your current floor’s condition. This check-up will tell you if it’s time for a new floor. It also helps guide your choices.
1. Signs It’s Time for a Change
Look for these signs that your kitchen floor needs replacing:
- Cracked, damaged, or worn tiles or planks
- Uneven surfaces that pose a tripping hazard
- Excessive wear and tear, particularly in high-traffic areas
- Discoloration or staining that can’t be easily cleaned
- An outdated or outdated style that no longer fits your kitchen aesthetic
2. Measuring Your Kitchen Floor Space
Measuring your kitchen’s dimensions is key before renovating the floor. This helps you figure out how much flooring you need. Here’s how to measure:
- Use a tape measure to record the length and width of your kitchen in feet or meters.
- Multiply the length and width to calculate the total square footage of the space.
- Consider any irregular shapes or alcoves that may require additional measurements.
- Add a 10-15% buffer to your calculations to account for waste and pattern matching.
By checking your current kitchen floor and measuring the space, you’re ready to plan a successful kitchen floor renovation. This will meet your needs and tastes.
Choosing the Right Flooring Material
When picking kitchen flooring, you have many options. You can choose from durable and easy-to-maintain materials or go for budget-friendly choices. The right flooring can greatly improve your kitchen’s look and function.
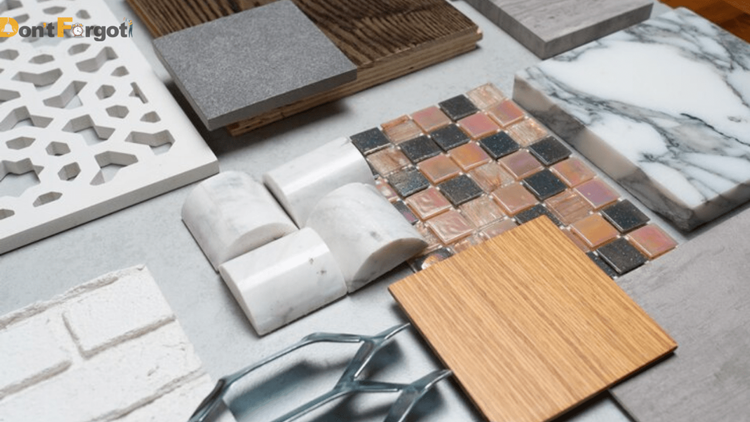
Popular Kitchen Flooring Options
- Tile: A classic choice, tile flooring offers many styles, colors, and patterns. It is highly durable, water-resistant, and easy to clean, making it a popular kitchen option.
- Luxury Vinyl Plank (LVP): LVP flooring has gained immense popularity in recent years. It combines the look of hardwood or tile with exceptional durability and water resistance, making it an ideal choice for busy kitchens.
- Hardwood: Hardwood floors add a timeless elegance to any kitchen. While they may require more maintenance than other options, they can be refinished over time, extending their lifespan.
- Laminate: A budget-friendly alternative, laminate flooring mimics the appearance of materials like wood or stone while providing a durable and easy-to-clean surface.
Considering Durability and Maintenance
When choosing kitchen flooring, consider how durable and easy it is to maintain. Kitchens see a lot of use and spills, so you need flooring to handle it. Tiles, LVP, and laminate are great because they’re tough and don’t let water damage them. Hardwood looks beautiful but needs more care to stay looking good.
| Flooring Material | Durability | Maintenance | Water Resistance |
|---|---|---|---|
| Tile | Excellent | Easy | Excellent |
| Luxury Vinyl Plank (LVP) | Excellent | Easy | Excellent |
| Hardwood | Good | Moderate | Fair |
| Laminate | Good | Easy | Good |
“Choosing the right kitchen flooring involves carefully considering its appearance, durability, and how easy it is to maintain. Consider your lifestyle, budget, and long-term goals to make the best choice for your space.”
Preparing the Subfloor
Before starting your kitchen floor renovation or DIY kitchen flooring project, make sure to prepare the subfloor well. This step is key to a smooth and successful new kitchen floor installation. Fixing any subfloor issues ensures a lasting and good-looking result.
To get your subfloor ready for the new how to replace kitchen floor, follow these steps:
- Inspect the Subfloor: Look over the subfloor for cracks, uneven areas, or damage. Fix these problems before installing the new flooring.
- Create a smooth base: Eliminate unevenness by applying a self-leveling compound to high or low spots on the subfloor. This makes the surface even for the new flooring.
- Clean the Subfloor: Sweep, vacuum, and clean the subfloor to remove dust, debris, or contaminants. A clean surface is key for the new flooring to stick well.
- Apply a Primer or Sealant (Optional): If needed, apply a primer or sealant to the subfloor. This improves adhesion and protects against moisture.
Preparing the subfloor well sets the stage for a great kitchen floor renovation or DIY kitchen flooring project. With a strong foundation, your new kitchen floor will look and work well for many years.
Removing the Old Kitchen Floor
Getting ready to replace your kitchen floor is exciting. But first, you must remove the old one. This step is important for safety and proper disposal. It makes the renovation go smoothly.
1. Safety Precautions
When taking out an old kitchen floor, safety comes first. Protect yourself by wearing gloves, goggles, and a dust mask to shield yourself from debris and harmful particles. Make sure the area is well-ventilated to avoid breathing in harmful particles. These steps are key during the kitchen floor renovation process.
2. Disposal of Old Flooring Materials
After removing the old floor, you need to dispose of it properly. Contact your local authorities for information on how to dispose of your flooring type, such as hardwood, tile, or vinyl. Some floors need special handling, so follow the rules to dispose of them responsibly.
- Properly dispose of old flooring materials to minimize environmental impact.
- Consult local authorities for guidance on the appropriate disposal methods for your kitchen flooring type.
- Take safety precautions, such as wearing protective gear, to safeguard yourself during removal.
These steps will help you safely remove your old kitchen floor. Then, you’ll be ready for a new, beautiful floor that will make your kitchen look great.
Installing the New Kitchen Floor
Now that the subfloor is ready and the old flooring is gone, it’s time to install your new kitchen floor. Whether you do it yourself or hire a pro, step-by-step kitchen flooring installation is key. It requires detail and careful steps.

Step-by-Step Installation Guide
Here’s how to install your new kitchen floor successfully:
- First, put down the underlayment as the instructions say. This makes a smooth, even base for your new flooring.
- Consider your kitchen’s size and shape when planning your flooring layout. Make sure the pattern looks good.
- Start putting in the flooring at the corner or along the longest wall. Use the right tools and fasteners to attach it well.
- Work step by step, cutting pieces to fit around any obstacles. Follow the manufacturer’s advice for cutting and spacing.
- After you’ve covered the whole floor, add any sealants or finishes to protect and improve its look.
The method of installing a new kitchen floor can vary depending on the flooring type you choose. Always check the manufacturer’s guide and proceed slowly for a professional finish.
How to Replace Kitchen Floor?
Replacing your kitchen floor is a big project, but with the right steps, you can do it yourself. This guide will show you how to change your kitchen’s look and boost your home’s value.
The steps to replacing a kitchen floor include assessing your current floor and installing a new one. Here are the key things to consider and do for a great kitchen floor update.
1. Measure and Plan
First, measure your kitchen floor accurately. This will help you determine how much flooring you need and ensure the installation goes smoothly. Also, look into kitchen flooring installation options and pick a material that’s tough, easy to maintain, and fits your style and budget.
2. Prepare the Subfloor
A good subfloor is key to a successful kitchen floor renovation. You might need to level, fix, or replace the subfloor to create a smooth, stable base for the new flooring.
3. Remove the Old Flooring
Removing the old kitchen floor is a big step. Wear protective gear and dispose of the old materials safely to protect the environment.
4. Install the New Flooring
Install the new kitchen flooring as the maker says. Depending on your choice, this could mean laying tiles, planks, or sheets.
By following these steps and focusing on the details, you can get a beautiful, seamless kitchen floor replacement. This will make your kitchen look and work better, too.
Finishing Touches and Maintenance Tips
After installing your new kitchen floor, it’s time for the final touches. Protecting your new flooring is crucial to keep it looking great. Following a few steps, your kitchen floor will stay beautiful for many years.
Sealing and Protecting Your New Floor
Depending on your flooring type, you might need to apply a sealer or finish. Sealing and protecting your new kitchen floor does more than just look good. It also makes it resistant to stains, spills, and daily wear. Always follow the manufacturer’s instructions for the best results.
Keeping your new kitchen floor clean is important for its upkeep. Sweep or vacuum often to remove debris. Clean the floor with a mild, pH-neutral cleaner to keep it looking great. Fix any scratches or chips quickly to keep your flooring in top shape and prevent more damage.
FAQ (How to Replace Kitchen Floor?)
What are the signs that it’s time to replace my kitchen floor?
Look for cracked, damaged, or worn-out tiles or planks. Uneven surfaces and excessive wear and tear are also signs. If your floor doesn’t look good or last long, it’s time for a new one.
How do I measure my kitchen floor space to determine the amount of new flooring needed?
Measure the length and width of your kitchen in feet. Then, multiply these numbers together to find the square footage. This will tell you how much new flooring you need.
What are some popular kitchen flooring options to consider?
Popular choices include tile, luxury vinyl plank (LVP), hardwood, and laminate. Each has its own benefits, such as durability and water resistance. When choosing, consider what you need and your budget.
How do I install the new kitchen floor?
Start by laying down an underlayment. Then, align the first row of flooring and secure the rest. Always follow the manufacturer’s instructions for a professional look that lasts.
How do I maintain and protect my new kitchen floor?
Seal and protect your new floor with a finish or sealant. Clean it regularly and fix any problems quickly. This keeps your kitchen floor looking great for a long time.